How To Place A Pixel When The Offer Won’t Allow
Today I’m going to teach you a clever strategy when the affiliate marketing offer that you’re promoting won’t allow you to place a pixel.
For Facebook ads, placing a pixel is incredibly important because you can’t tell which ads work without it. It’s simpler in e-commerce/drop shipping: it’s one brand, you’re the only one sending traffic, and you can just plug your Facebook pixel right into Shopify, and it does everything for you. But with affiliate marketing, some lead gen offers/affiliate marketing offers aren’t able to place pixels, or maybe they can only place so many pixels and you can’t anymore.
The workaround
So, here is a clever workaround for having a pixel in your funnel when the advertiser doesn’t allow it.
On your pre-sale page built for your affiliate offer, if somebody clicks, it takes them to your affiliate offer page. The common method is to have a Facebook pixel placed after the user completes the final affiliate offer. That way, it can send the data back to Facebook as far as who purchased or who became a lead. But even if an advertiser is able to place your pixel, oftentimes the Facebook pixels can really fire very inaccurately and not give you very good data.
We will implement a way to fire your own pixel in-between the landing page and the offer site. This will give you concrete data on what ads are performing.
The difference in optimization
Instead of optimizing your Facebook campaign for a final offer conversion, you can instead optimize for somebody to click through on your landing page. This is very effective. If somebody has clicked on your ad and they’re clicking through your landing page, this person is likely interested.
Another reason why it works well is that it gives the data about your Facebook ad to you a lot faster.
With the traditional method, if your offer that you’re promoting pays $50 and the only time you get a Facebook pixel fired is when a $50 conversion happens, then you would need to spend hundreds of dollars a day to accurately test that.
With our method, optimizing for landing page clicks instead, you can be getting conversions for pennies on the dollar. If you’re just trying to figure out what image or what ad creative is going to work, you don’t need to run a website conversion objective campaign, optimizing towards a $50 CPA, to just tell if one image is more engaging than another. By optimizing for a lower conversion point when somebody clicks through on your landing page, you can get data much quicker as far as what works and what doesn’t.
My suggestion as a complete strategy
If you have the ability to place a pixel on the final conversion on the offer, start out by optimizing for a pixel after your landing page first. Once you find stuff that’s better than everything else, move it over to another ad set that optimizes for a different pixel after the final offer conversion and see how that affects your results.
How to set up the pixel in Unbounce
Inside your Unbounce account, you will need a two-page funnel: one for your initial page and the other is the redirect page. This is in reverse order here:
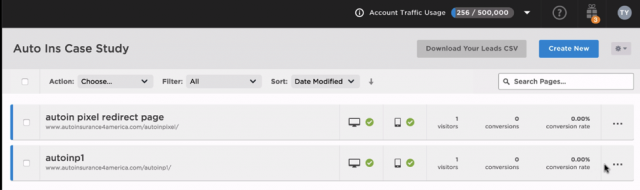
Click on the first entry (which is your redirect page) and we will add two elements to it:
- A Custom HTML widget that redirects the page to your affiliate offer link after a certain amount of time
- A JavaScript code that places your Facebook pixel to the page.
Let’s add the first one:
- From the sidebar, drag and drop a “Custom HTML” button </> to the middle
- Edit it by double-clicking on it.
- Add the following 1 line code:
<meta http-equiv=”refresh”
content=”1; url=http://youraffofferlink.com>”
Let’s add the Facebook pixel:
- Click on the JavaScript tab at the bottom
- Copy-paste the following code there (this is a Lead pixel, or whatever event you prefer):
Note:
This JavaScript example is not actually a lead, it’s just somebody that simply clicked through my landing page, then I might place a different event like a CompleteRegistration or SubmitApplication event on the offer side if the offer actually allows me to place that pixel.
Summary
The main difference between a traditional way and our way is the following:
- Traditionally, a landing page has a button that takes the user to another website, the final offer.
- With our method, the button actually opens an intermediate, empty, invisible website first that will in turn automatically redirect to the final offer page. Invisible difference to the user, but in the process, it fires a Facebook pixel for us.
We’ve found very good results with this. It’s an extremely helpful way to structure your pixels, especially when you’re in the initial testing phase.
If you’re promoting an offer that has a higher CPA and don’t want to spend hundreds of dollars per day to get pixel data, you can test with a much lower budget by optimizing for landing page clicks.
Then you can either scale up the ads, optimizing for that preliminary lead event after they click through the landing page, or move it over to a different pixel event that’s placed after the final conversion event on the offer — if you have that capability.
I hope that this is helpful for you to test better in your campaigns.
Talk soon!
– Tyler